

How to make a 3D print curing station for around $70
 Source: Windows Central
When I first started 3D printing with resin, I was unprepared. I didn't have whatever of the must-have resin press accessories, including any kind of curing system for my prints. Curing resin 3D prints when they come off the printer is important as it hardens them into a solid plastic and makes them much safer to handle. If you live in a sunny place, like me, you can go away with curing prints outside, but non anybody has that choice. Later seeing a post in a 3D press Facebook grouping about making a DIY curing station, I set out to make my own.
Products used in this guide
- A solid metal construction: Lixhult cabinet ($25 at Ikea)
- A resin curing delight: UV curing light, with turntable ($26 at Amazon)
How to brand a resin 3D print curing station
- Unpack your Lixhult cabinet and remove the top office. Lay it to i side.
- Choose a panel that isn't the superlative and lay it on a piece of cardboard or newspaper that is bigger than the panel.
- Spray the spray adhesive evenly over the inside of the console.
- Exist careful you don't spray over the edges also far.
-
Lay a sheet of the aluminum foil (shiny side upward) onto the far border of the console and slowly flatten it downwards with your hand. Be careful not to rip the foil.
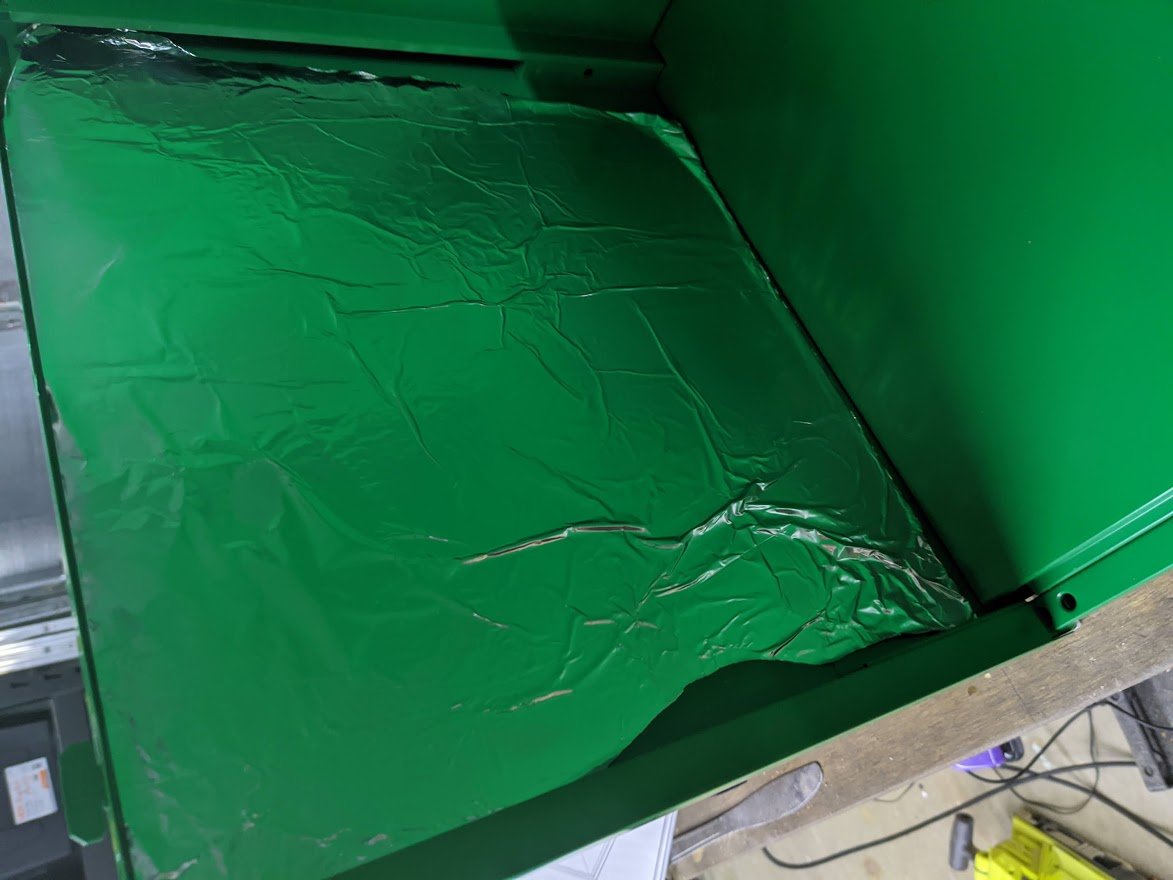 Source: Windows Central
 -
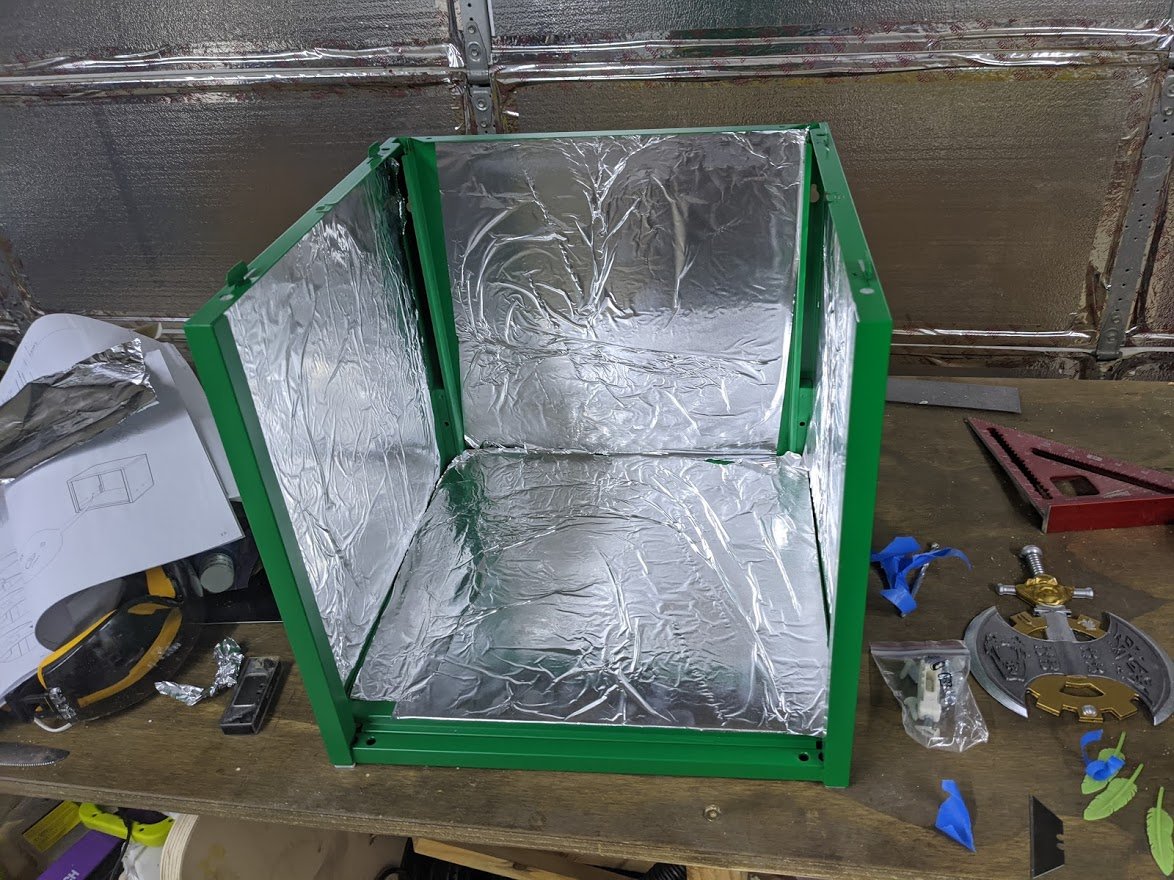
Repeat steps 2-4 for the 3 sides and bottom.
 Source: Windows Central
 - Repeat the same steps for the door, being careful not to spray the lock.
- Laying the foil can be tricky with the bar through the eye then endeavor to practise it in ii pieces.
-
Assemble the 3 sides and the bottom, leaving the door to one side.
 Source: @unclejessy4real
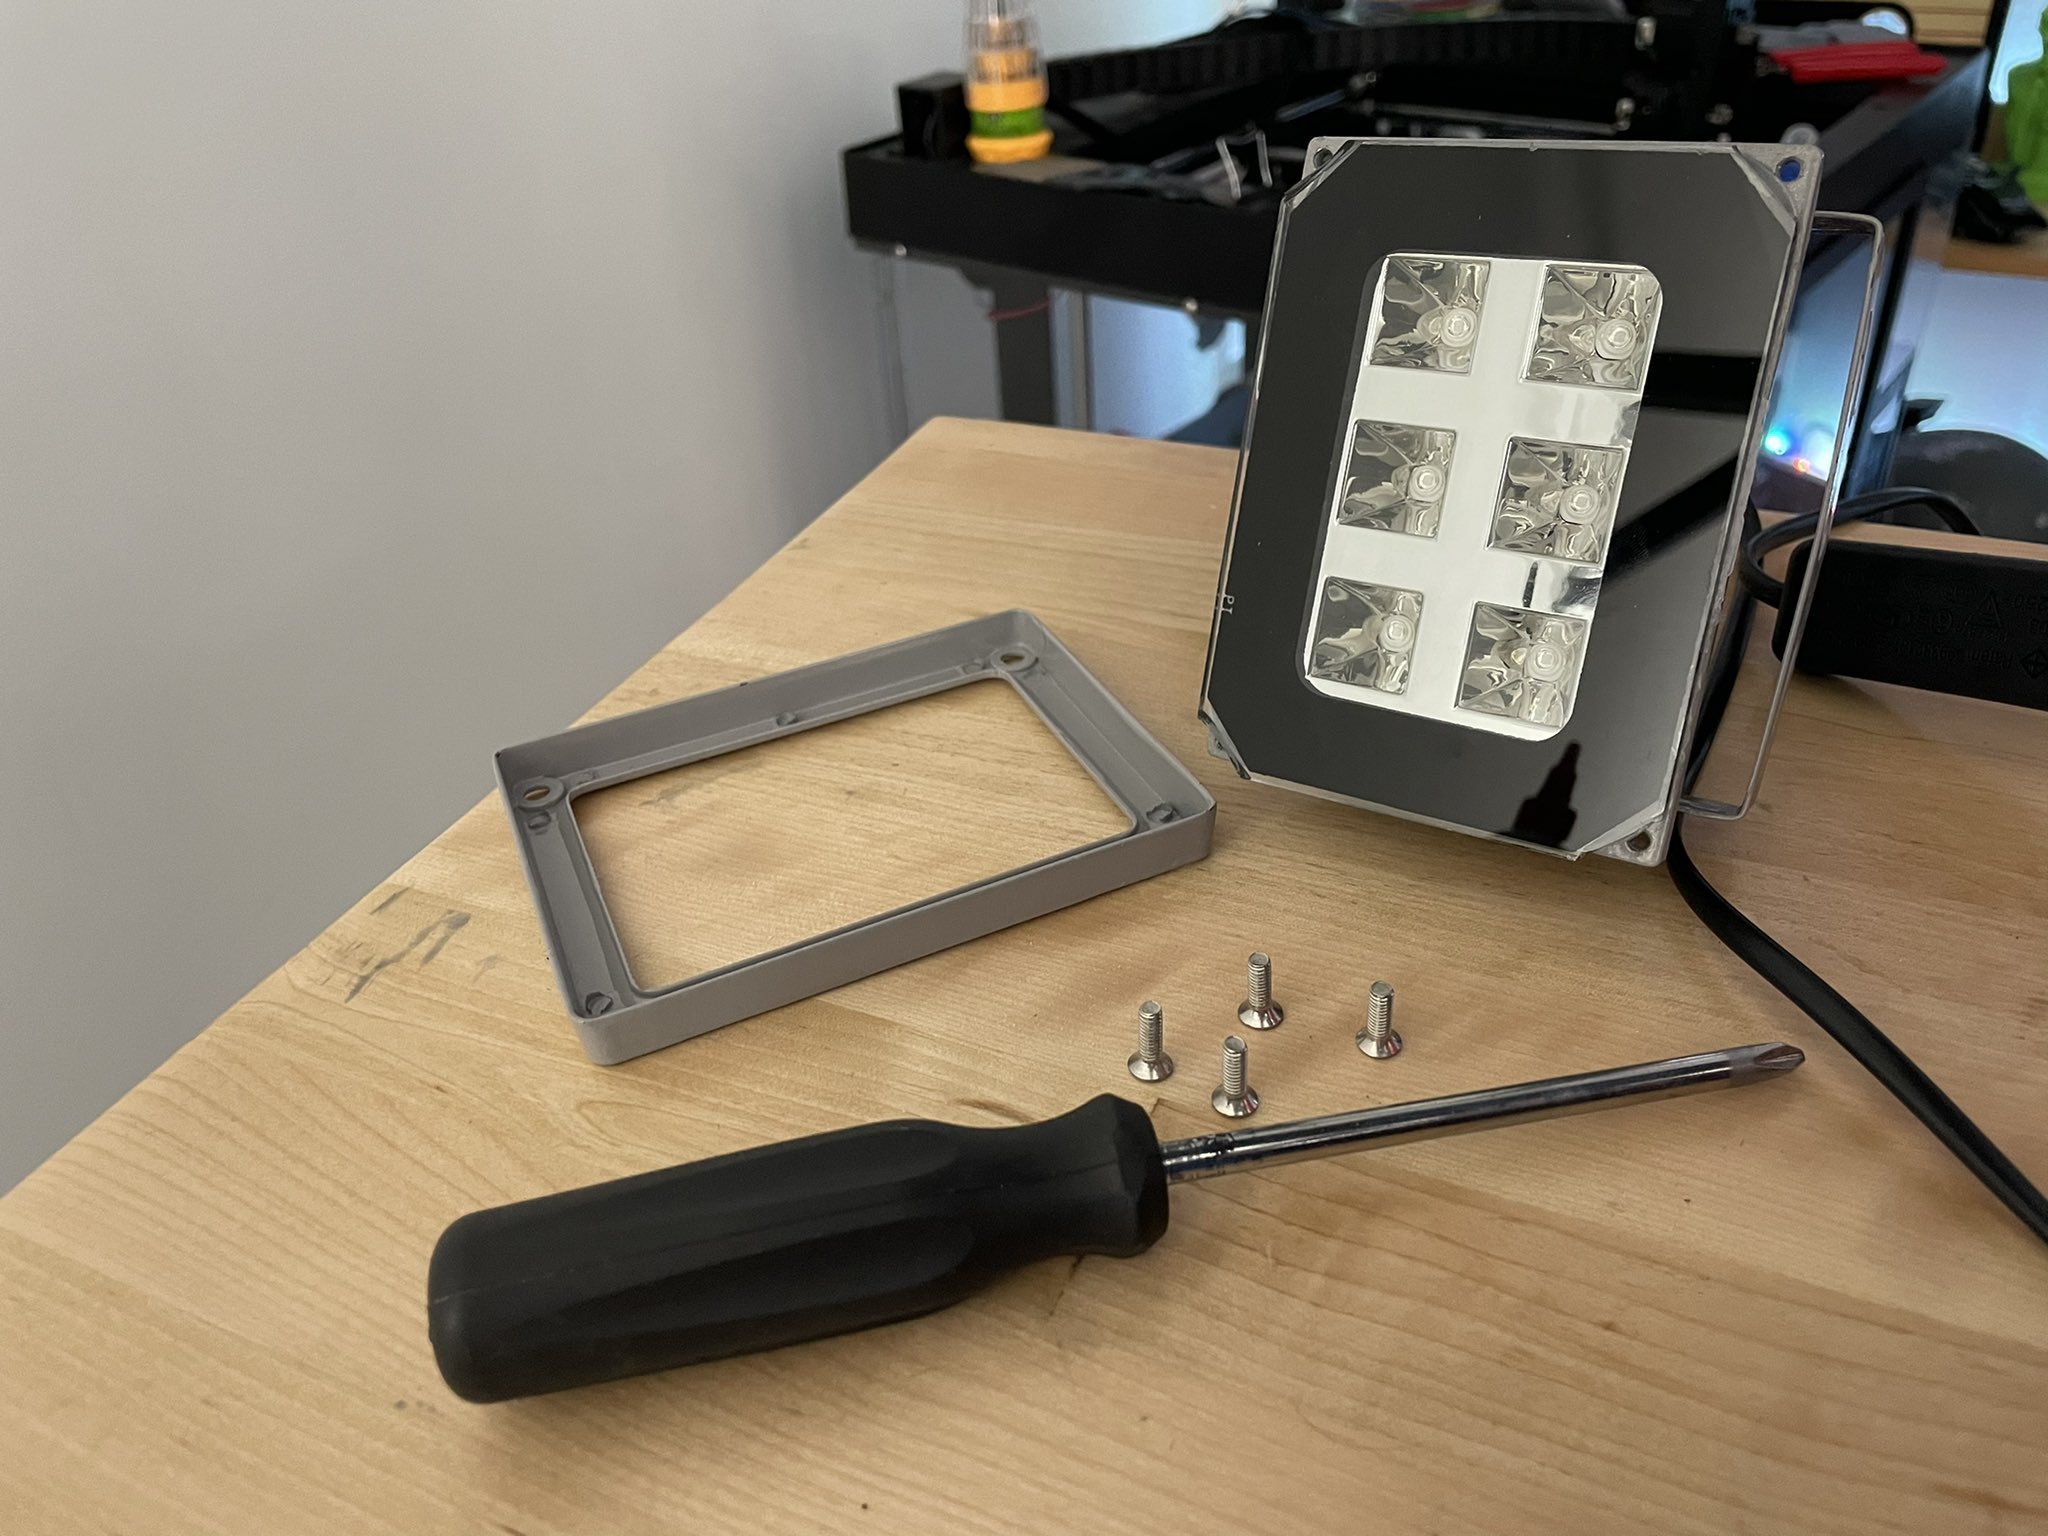
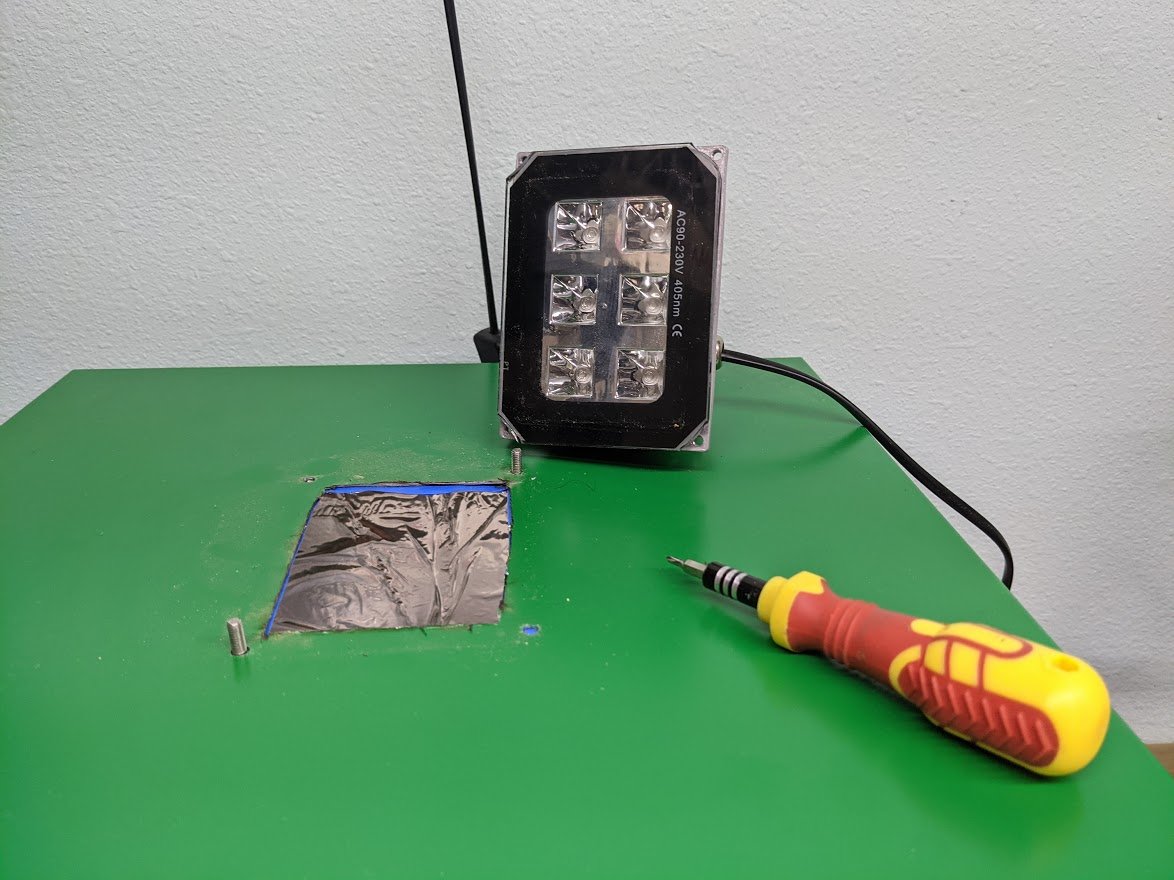
 - Remove the front frame from the UV lite.
- Be careful not to driblet the drinking glass equally it comes apart; it'southward a niggling slippery!
- Apply the UV lite front frame to marking the top of the Lixhult cabinet. Depict around the within of the frame and marking out the screw holes.
- + Warning! + We are about to apply ability tools, and so brand sure you have protective gear on!
-
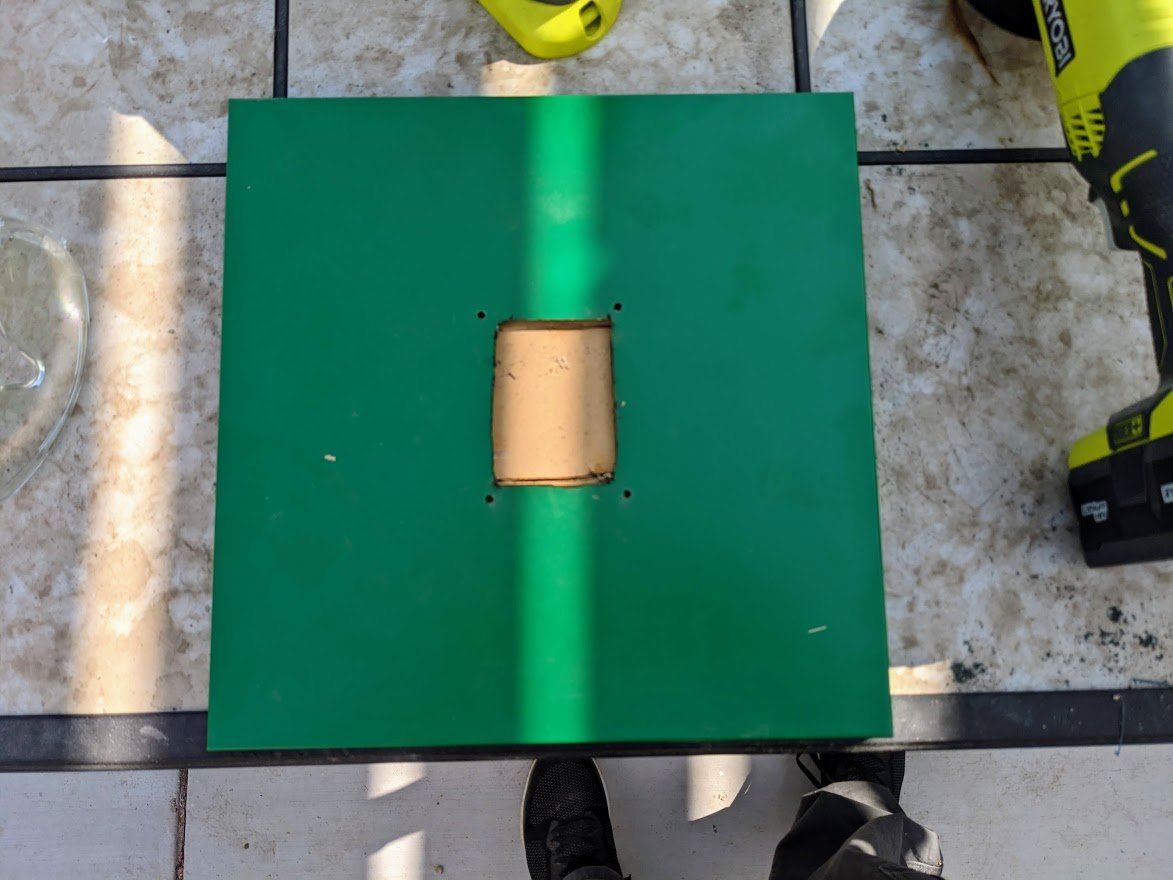
Place a wooden cake under the height console of Lixhult. You will be cutting through metal, and you don't want to damage the surface you are working on.
 Source: Windows Primal
 - Cut through the metal with an bending grinder forth the lines yous've drawn for the frame. Don't worry if information technology isn't pretty; no one will see information technology.
- Drill the four holes in position for the screws. Attempt to be accurate here.
- Use a file or the bending grinder to clean up whatsoever sharp edges.
-
Repeat steps 2-4 for the top console to cover it in foil, so gently cutting out a pigsty in the foil for the lite and the screw holes.
 Source: Windows Central
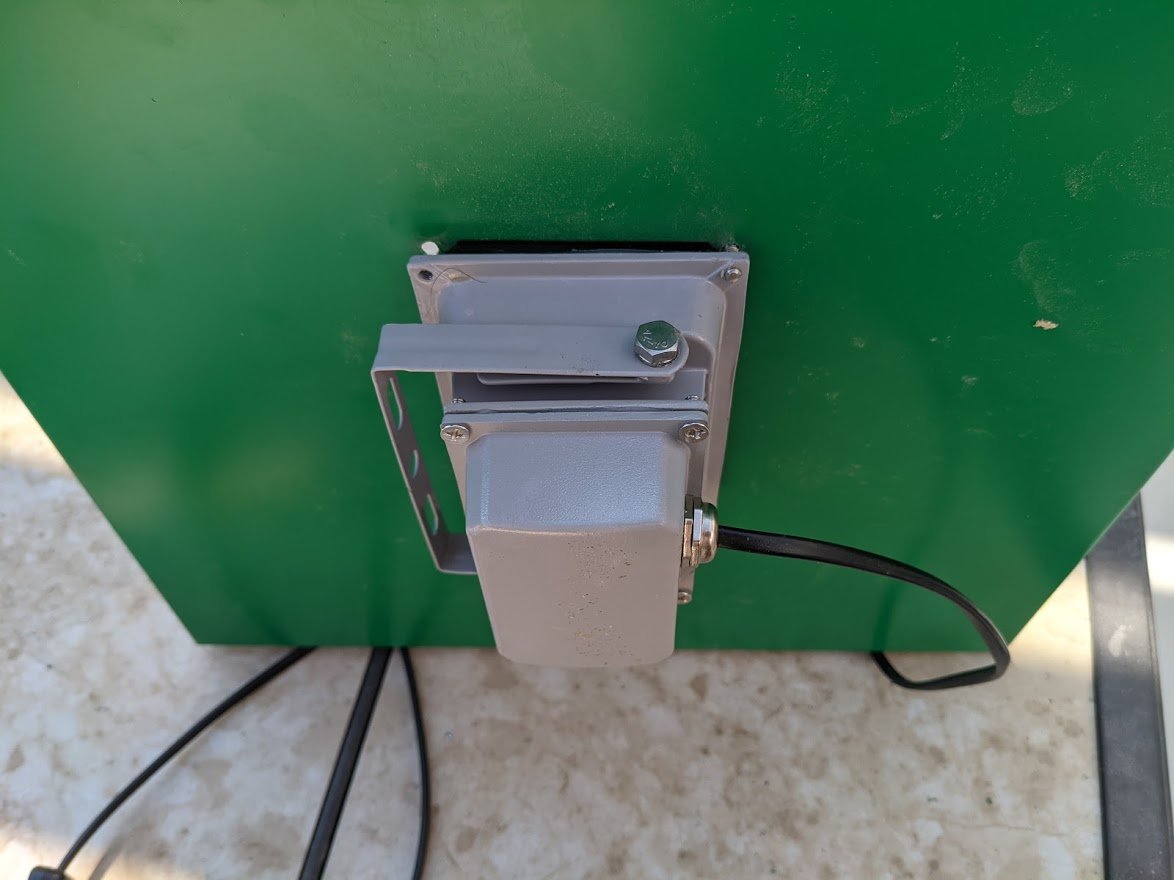
 - Put the UV lite on the acme of the peak console without the frame you removed.
-
Screw the original screws in from underneath.
 Source: Windows Primal
 - Utilize a handheld screwdriver to do this, equally the glass tin can crack hands.
- Fit the top console into position equally per the instructions from Ikea.
- Fit the door as per the instructions from Ikea.
-
If you lot will mountain the cabinet on the wall, you lot tin can do that now.
 Source: Windows Fundamental
 - Set the turntable in the eye of the cabinet.


And there we become!
Once all the steps above are completed, you'll at present have an awesome curing station big enough to fit about any print from a 3D printer. When you turn the light on, it will shine into the box, and the UV will bounciness around the aluminum foil and cure the model on all sides. The turntable itself is powered by UV light so it will work forever, and I even added a glass coaster to the top of the turntable to increment the size.
While there are enough of commercially bachelor systems for curing prints at present, they are a little pricier than this DIY method. Even the Launder and Cure v2 from Anycubic isn't large enough to cure models that come from bigger printers similar the Peopoly Phenom.
This DIY cabinet has been amazing for me, and I'm delighted with it. If y'all desire to upgrade information technology, you could supersede the aluminum foil with mirrored tile, or, if yous feel the one light isn't plenty, you could use one on top and one on the side to maximize the light spread.
 Source: Windows Central
I had a lot of fun making this build, and I learned a lot nearly how curing resin works. You may still need to cure the within of the print with a light pen, and I would advise curing in stages to make sure y'all don't burn the print, simply information technology has worked for me on every impress and so far.
Whether it is a behemothic piece of Mandalorian armor or a pocket-sized model of Frodo Baggins, this curing station will exist able to cope with everything you can throw at it. All for nether one hundred bucks.
Our top equipment picks
The chief body
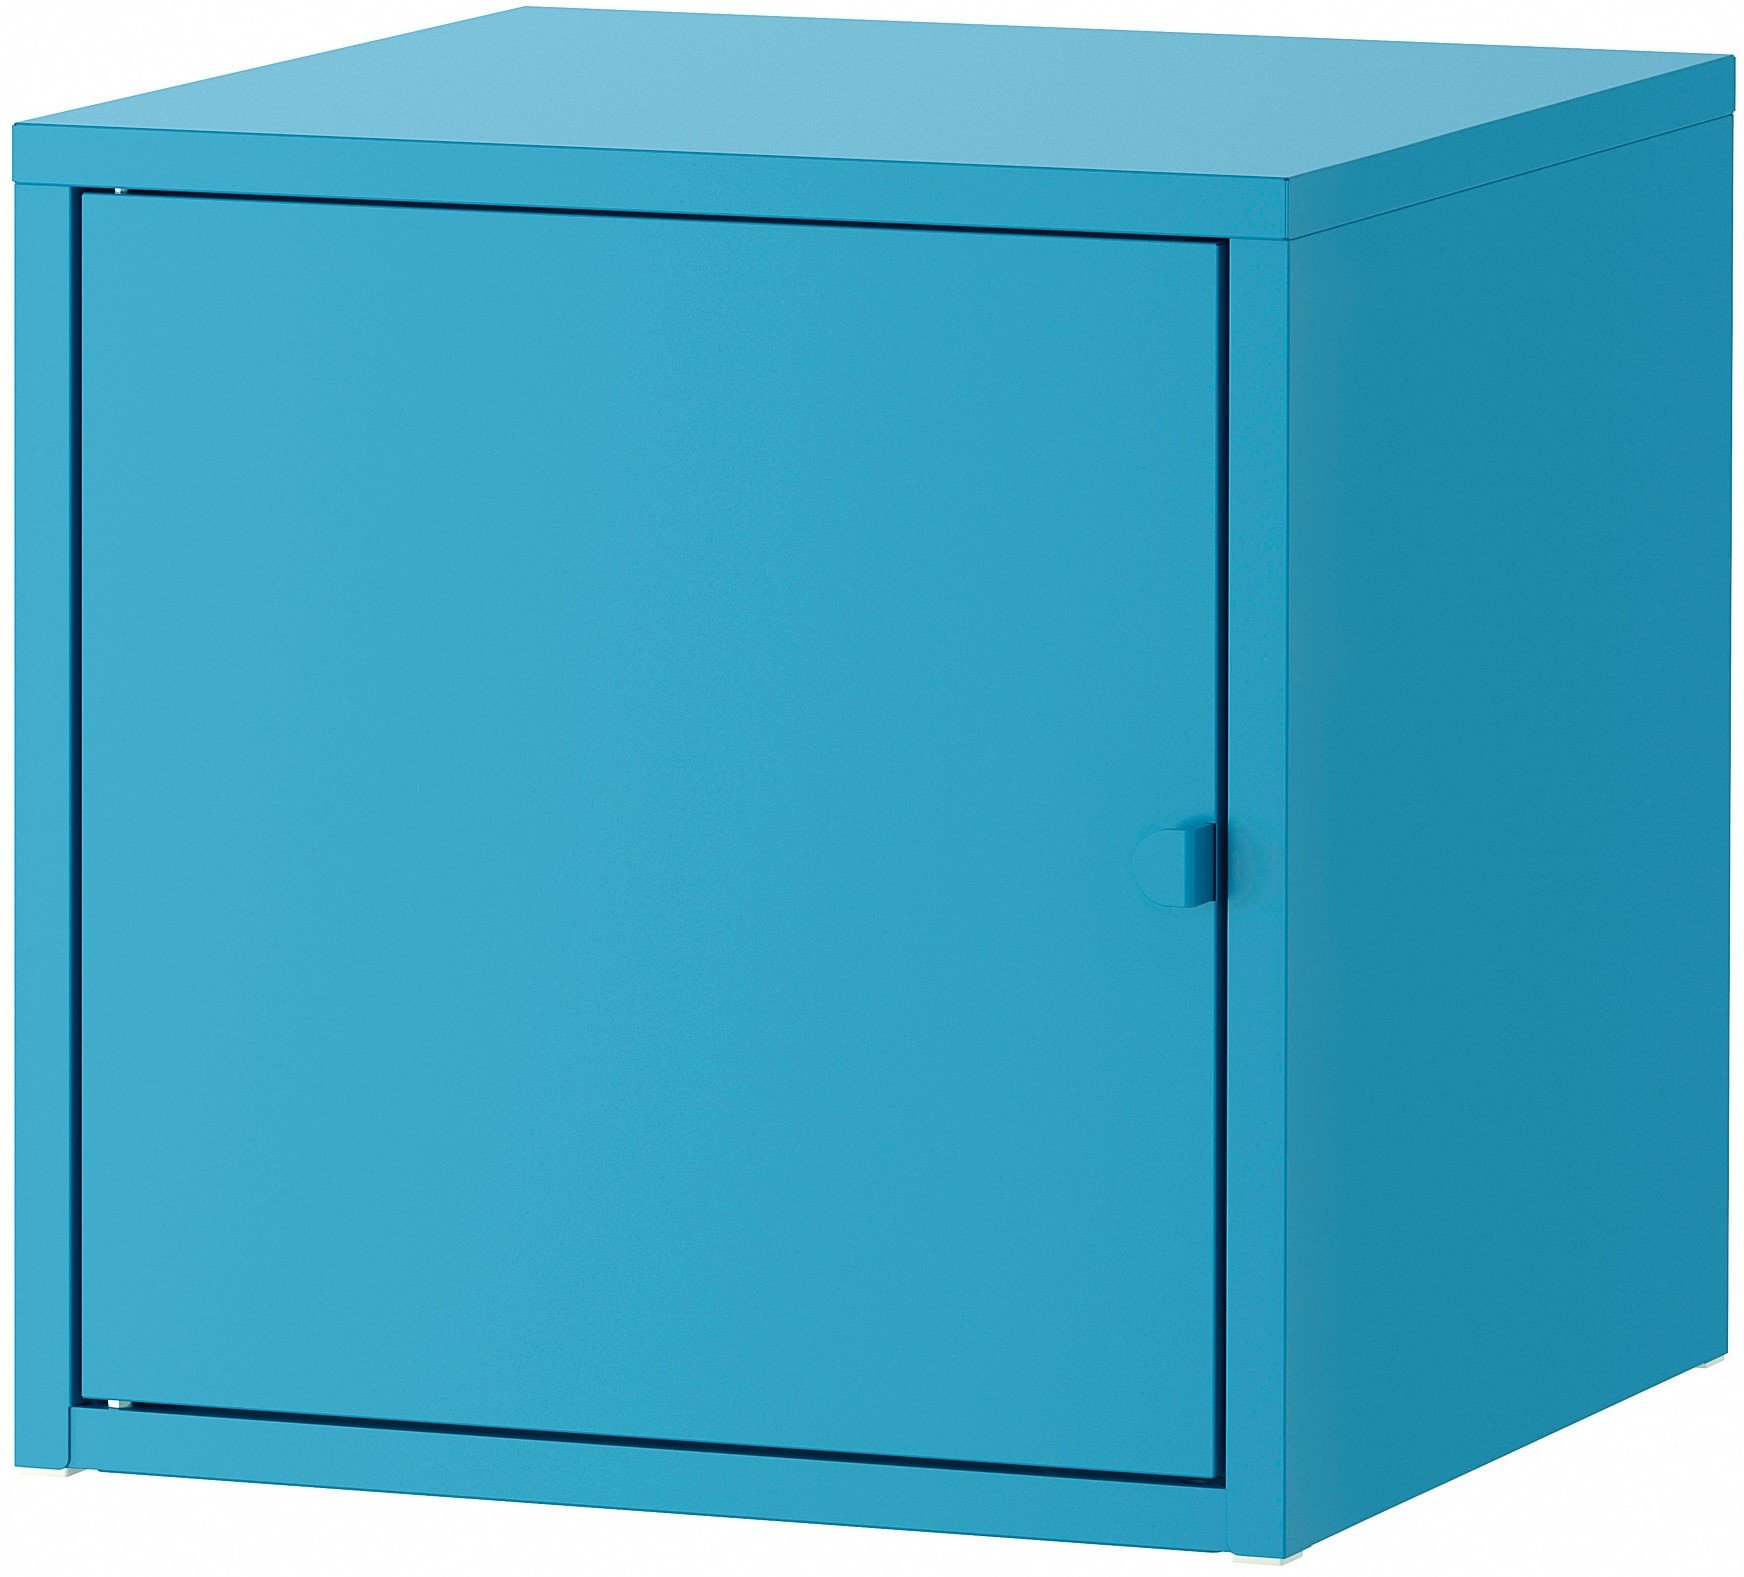
Lixhult cabinet
The whole case
Ikea is known for making quality gear for a peachy price, and the Lixhult cabinet epitomizes that ethos. It's perfect for keeping UV in and curing your prints.
I was lucky, I got my Lixhult chiffonier on auction for simply $15, but fifty-fifty at $25, the solid metal structure makes them perfect for this kind of project. I chose the thirteen-inch cabinet, but you could go even bigger if you wanted to print full-size helmets on the Phenom L. It's piece of cake to put together, tin be hung on the wall, and is then enough to cut equally needed.
Let there be low-cal
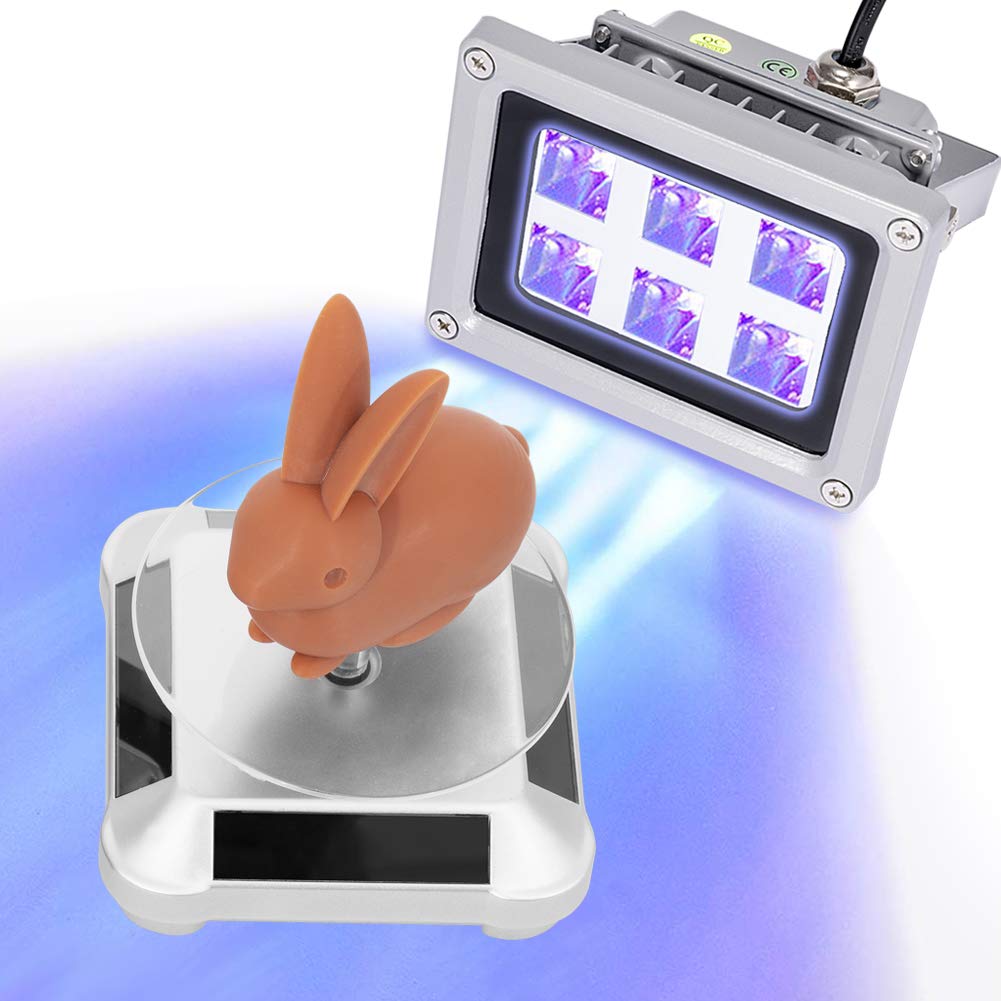
3D Printer UV Resin Curing Light
Polish downward on us
A UV curing light like this is the all-time style to safely and easily cure your resin 3D prints. This lite fifty-fifty comes with a UV-powered turntable to brand life even easier.
Of course, the whole point of this curing station is to make this UV light more effective. Sure, you can use this handheld to move it slowly over the model, but that takes personal fourth dimension, care, and extra equipment to stay safety. Give your UV light a home with this DIY build.
Boosted Equipment
These are the items that are used to finish off the build, only you don't need to buy them if y'all take them already. Most people have aluminum foil in their kitchens, and I suppose you could apply whatever type of mucilage to stick the foil on. I institute spray mucilage worked all-time, notwithstanding.
Elmer's Spray Adhesive
Elmer's spray glue lays on evenly and sets quickly, making it the perfect glue for this job.
Reynolds Wrap Standard Aluminum Foil
This is aluminum foil. I'thou sure you have all seen it before. It's great, I guess? It does what aluminum foil does.
We may earn a commission for purchases using our links. Learn more.

James Bricknell
James built his first PC when he was 13 and has never looked back. He can exist found on Windows Cardinal, usually in the corner where all the 3D printers are, or huddled around the Xbox playing the latest games.

Source: https://www.windowscentral.com/how-make-3d-print-curing-station-around-70
Posted by: dixonknour2001.blogspot.com
0 Response to "How to make a 3D print curing station for around $70"
Post a Comment